Social Wall
 Feed Analytics


Videos in a feed are saved as WordPress custom posts as drafts. How to change that so they become visitable pages.
Would you like to turn the videos in your YouTube feeds into posts on your WordPress site?
YouTube Feed saves each video it shows as a post of its own, so you can manage the videos like any other content. This guide explains how those posts work, how to change their settings, how to add categories and tags, and how to fix 404 errors.
Before you get started, make sure YouTube Feed is installed and activated on your WordPress site.
Here is what we will cover:
- How Does YouTube Feed Save Videos as Posts?
- Managing Saved Videos
- Changing the Single Video Settings
- Turning Off Video Posts
- Adding Categories and Tags to Video Posts
- Fixing 404 Errors on Video Posts
- Refreshing Saved Videos
- Frequently Asked Questions
How Does YouTube Feed Save Videos as Posts?
When a page with one of your feeds loads, YouTube Feed saves each video in the feed to your site as a post. The posts use their own post type, called YouTube Videos. They appear in your dashboard under YouTube Videos. They are separate from your regular posts and pages.
This happens in the paid version of YouTube Feed, as long as the feed has loaded on your site at least once. The plugin saves new videos as drafts by default, so nothing is public until you publish it.
The content of each post is the [youtube-feed-single] shortcode. It shows the video, along with the information you choose in the Single Video settings.
Managing Saved Videos
To get started, we’ll open the page that lists your saved videos.
The Single Videos page needs the plus license level or higher. Saved video posts are also listed under YouTube Videos in your dashboard.
The Single Videos page shows your saved videos by channel. From your WordPress admin sidebar, go to YouTube Feed » Single Videos.
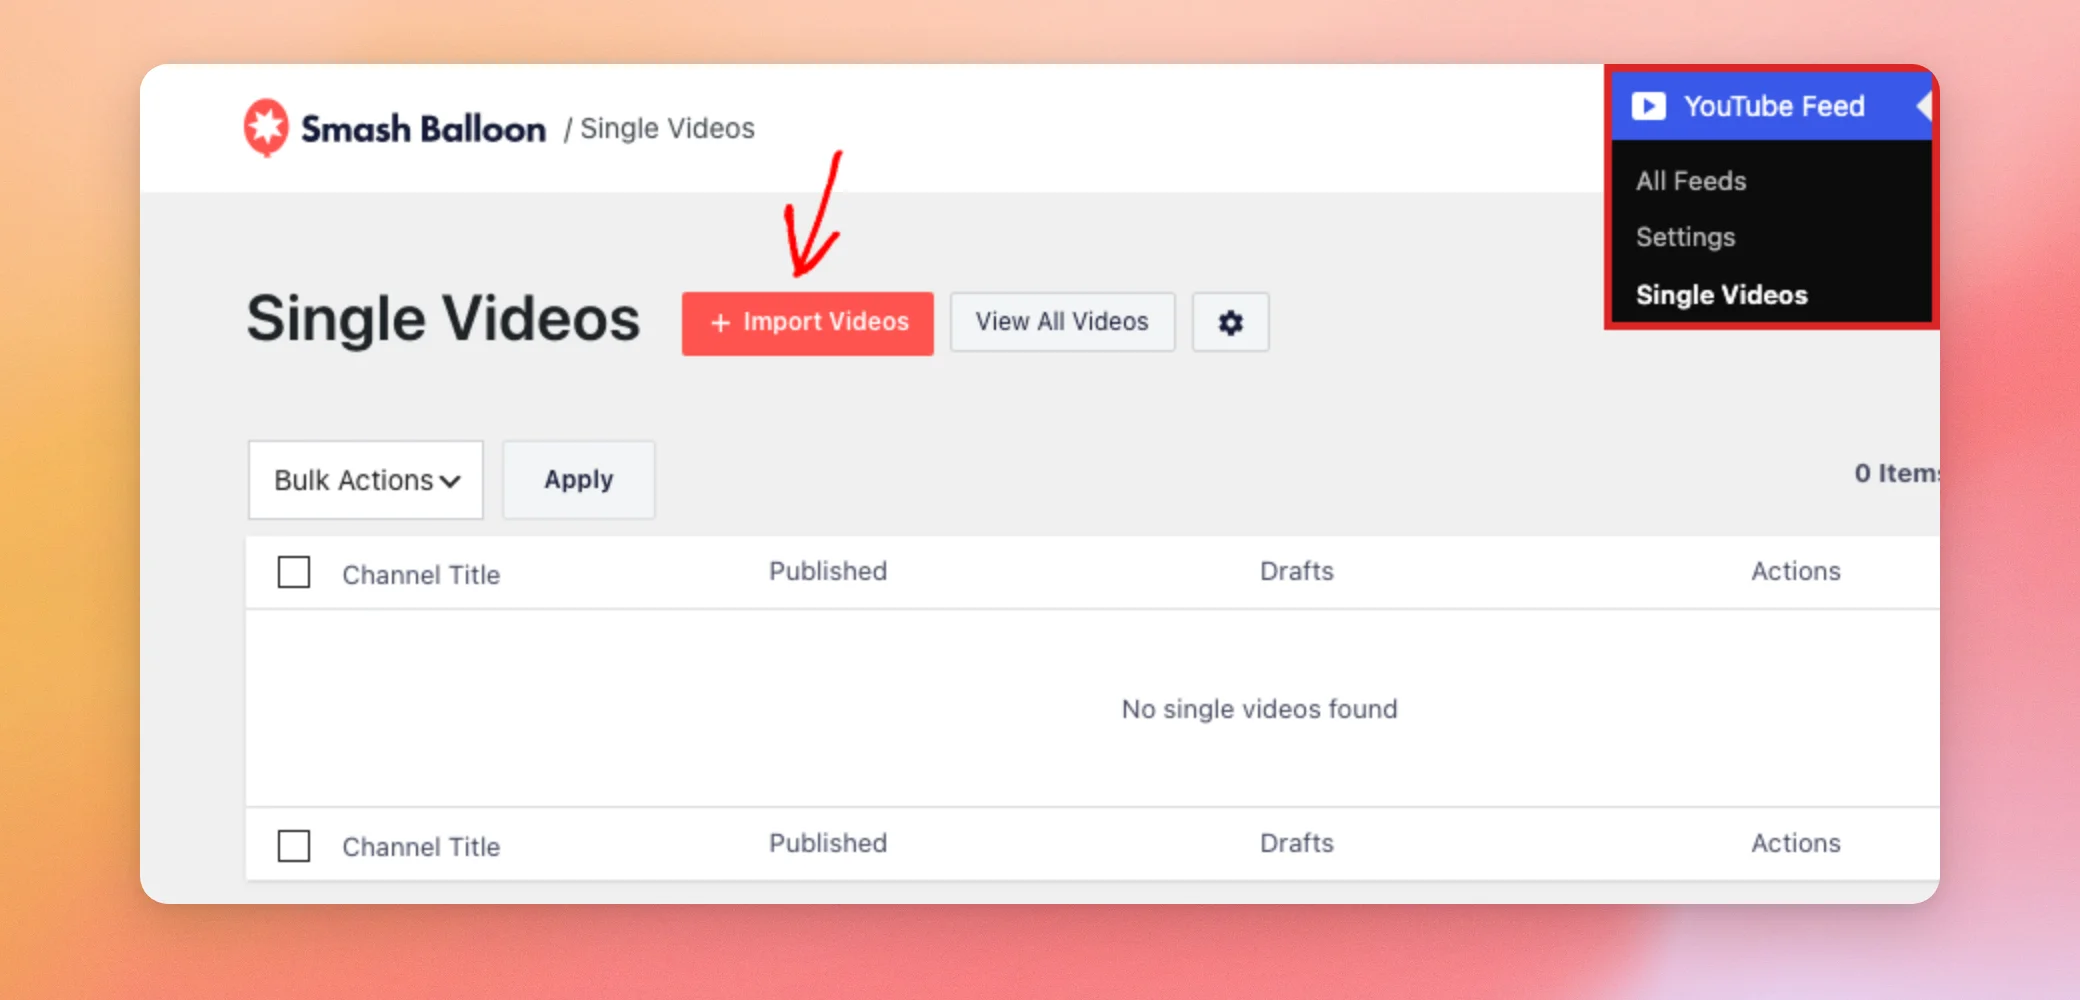
Importing videos requires a YouTube API key. For help creating one, see our guide on creating and using a YouTube API key.
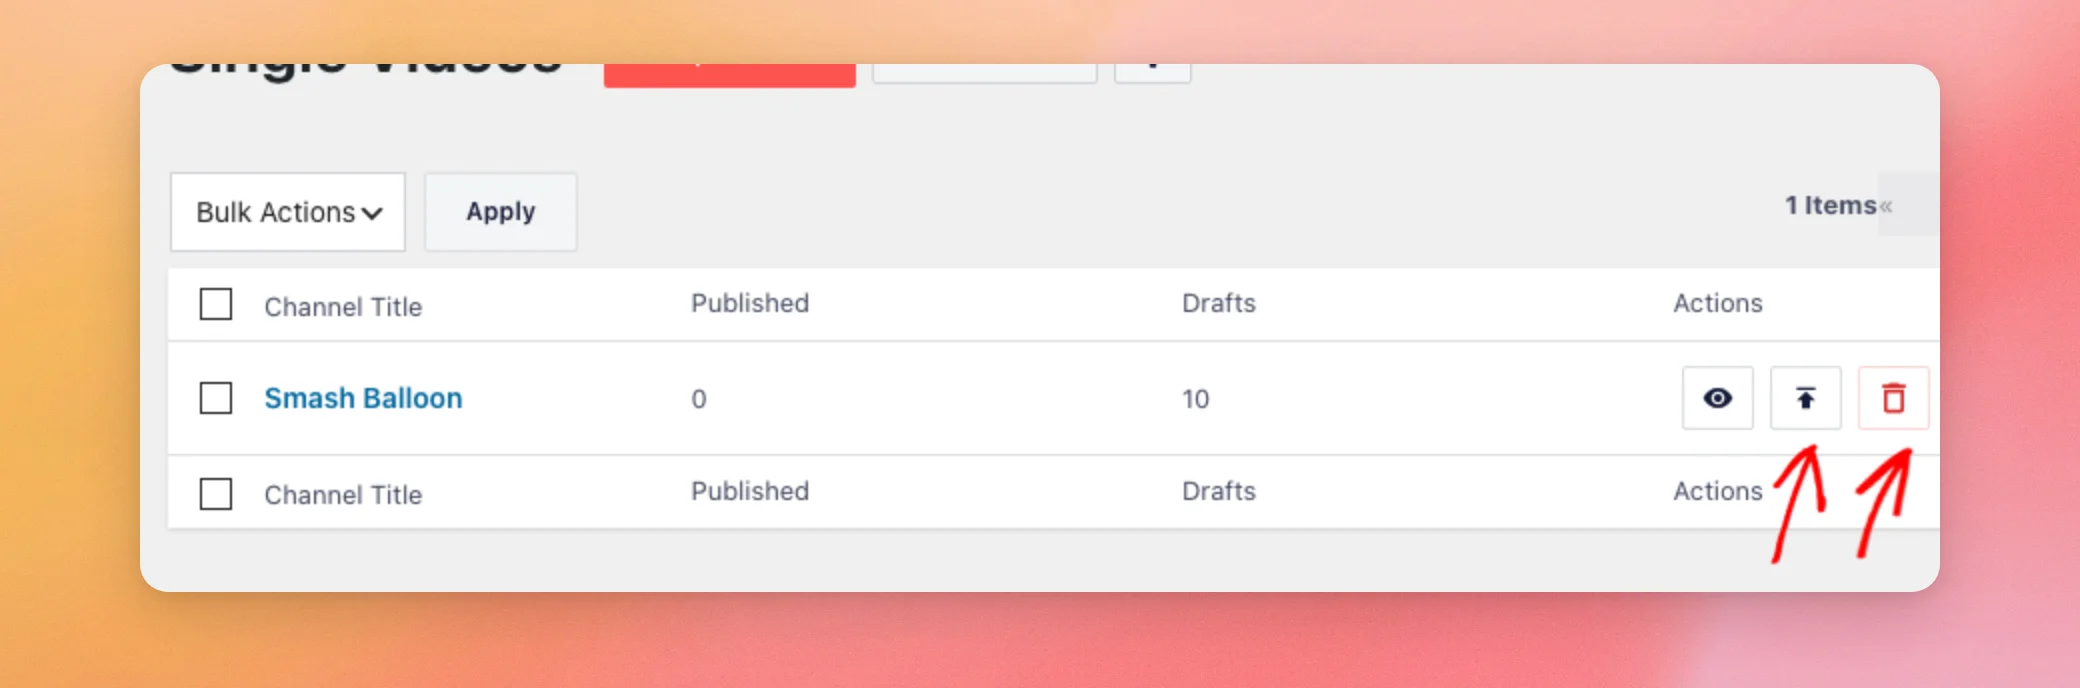
The page lists your channels. For each channel, it shows how many of its videos are published and how many are drafts. Each channel row has 3 icon buttons. From left to right, they are View All, Publish All, and Delete All. That way, you can handle a whole channel’s videos in one step. If no videos have been saved yet, the list shows “No single videos found.”
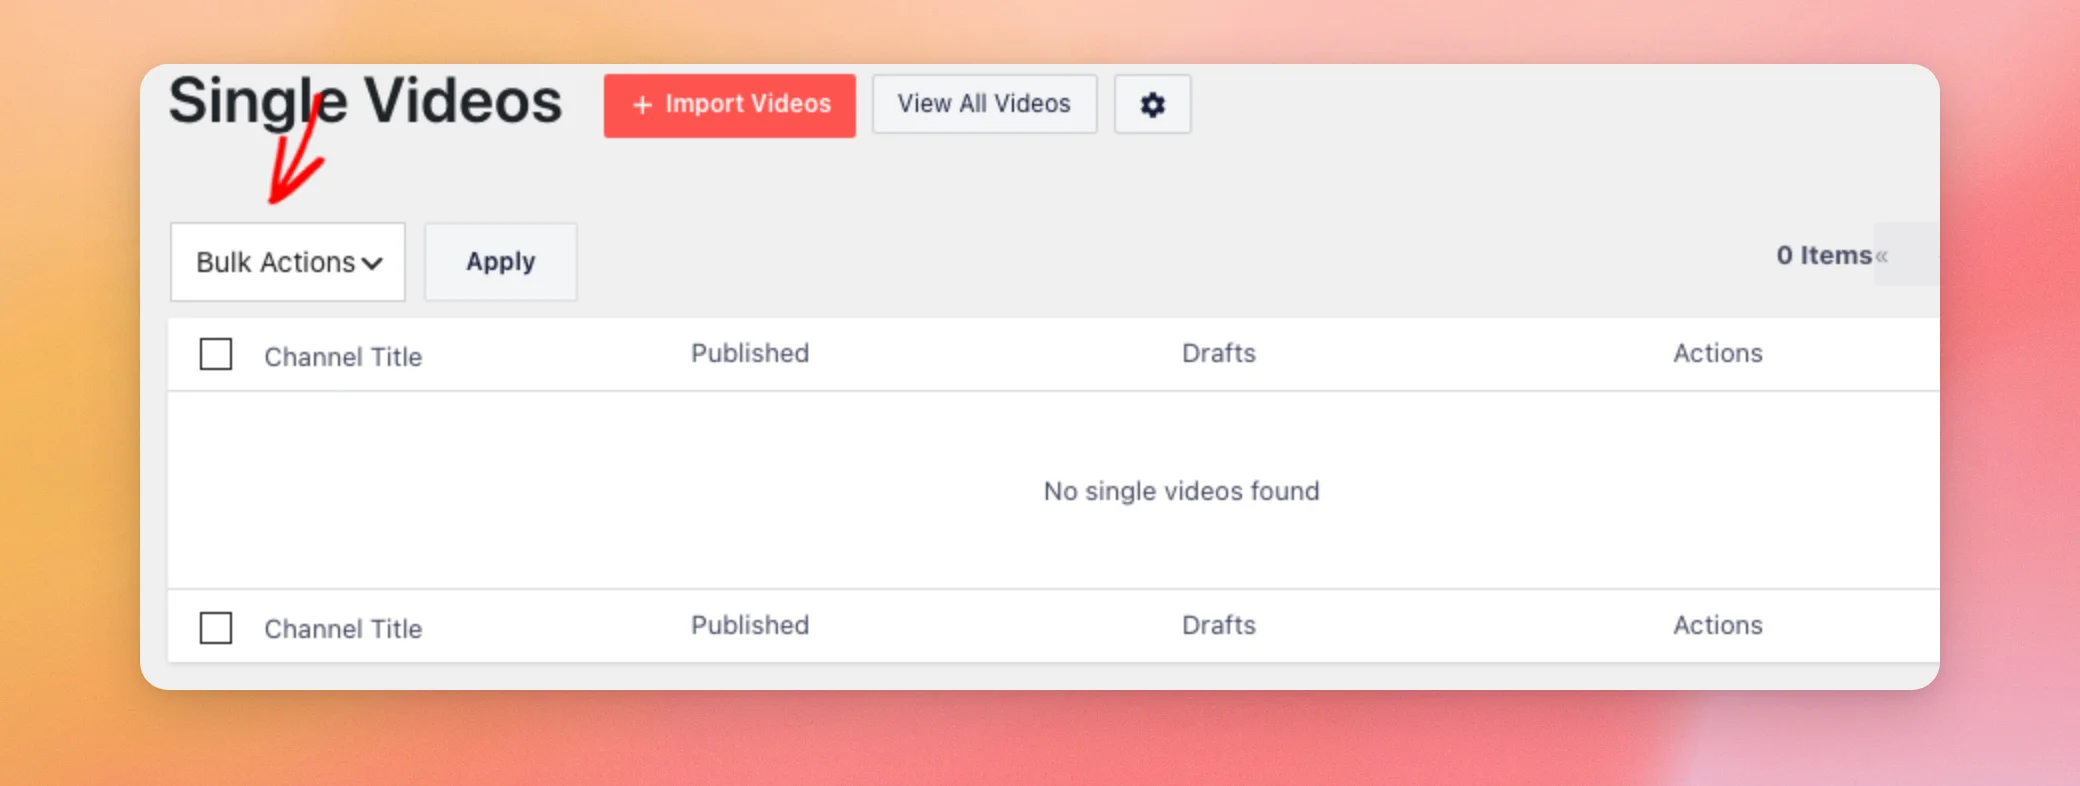
The Bulk Actions menu above the list does the same for the channels you select. It has 2 options, Publish All and Delete All. First, select one or more channels. Then choose an option and click Apply.
Delete All removes the saved posts for that channel permanently. Your feed is not affected. The plugin saves the videos again the next time the feed updates from YouTube.
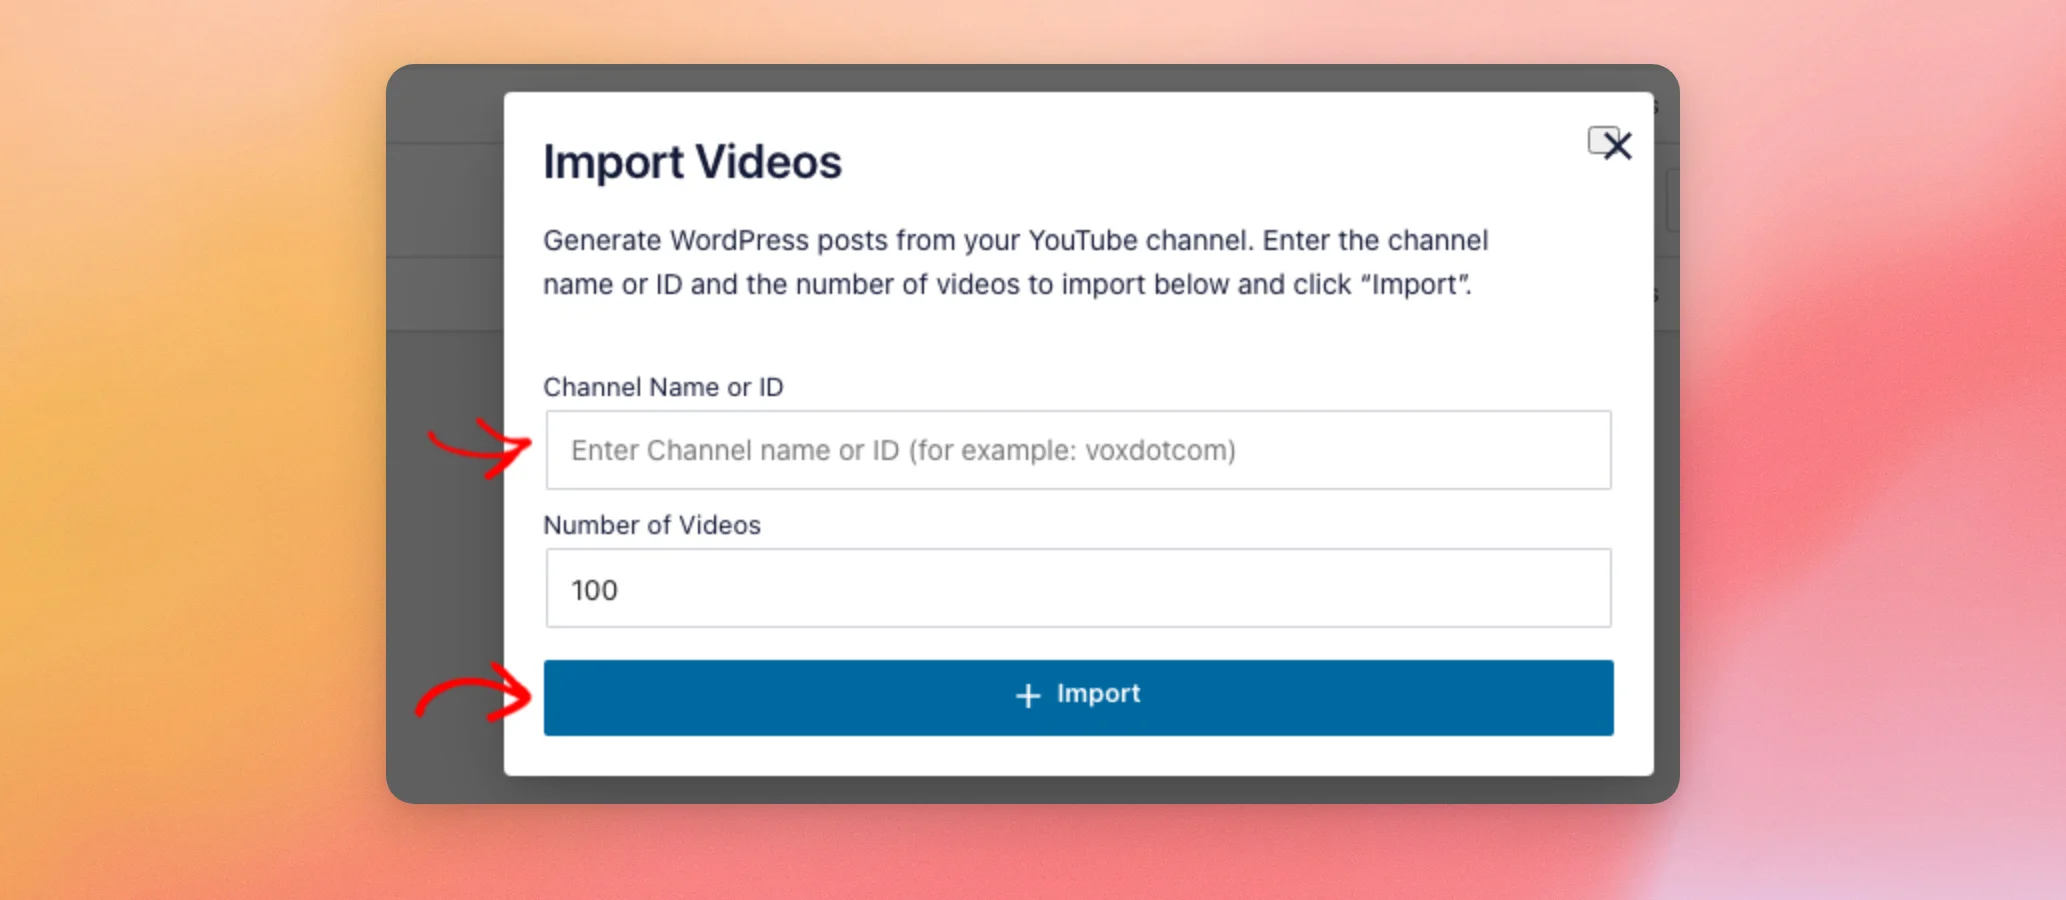
You can also save videos from a channel yourself. To do this, click Import Videos at the top of the page. In the window that opens, enter the channel name or ID in the Channel Name or ID field. The Number of Videos field starts at 100, and you can change it. Then click Import. The View All Videos and gear buttons sit beside Import Videos.
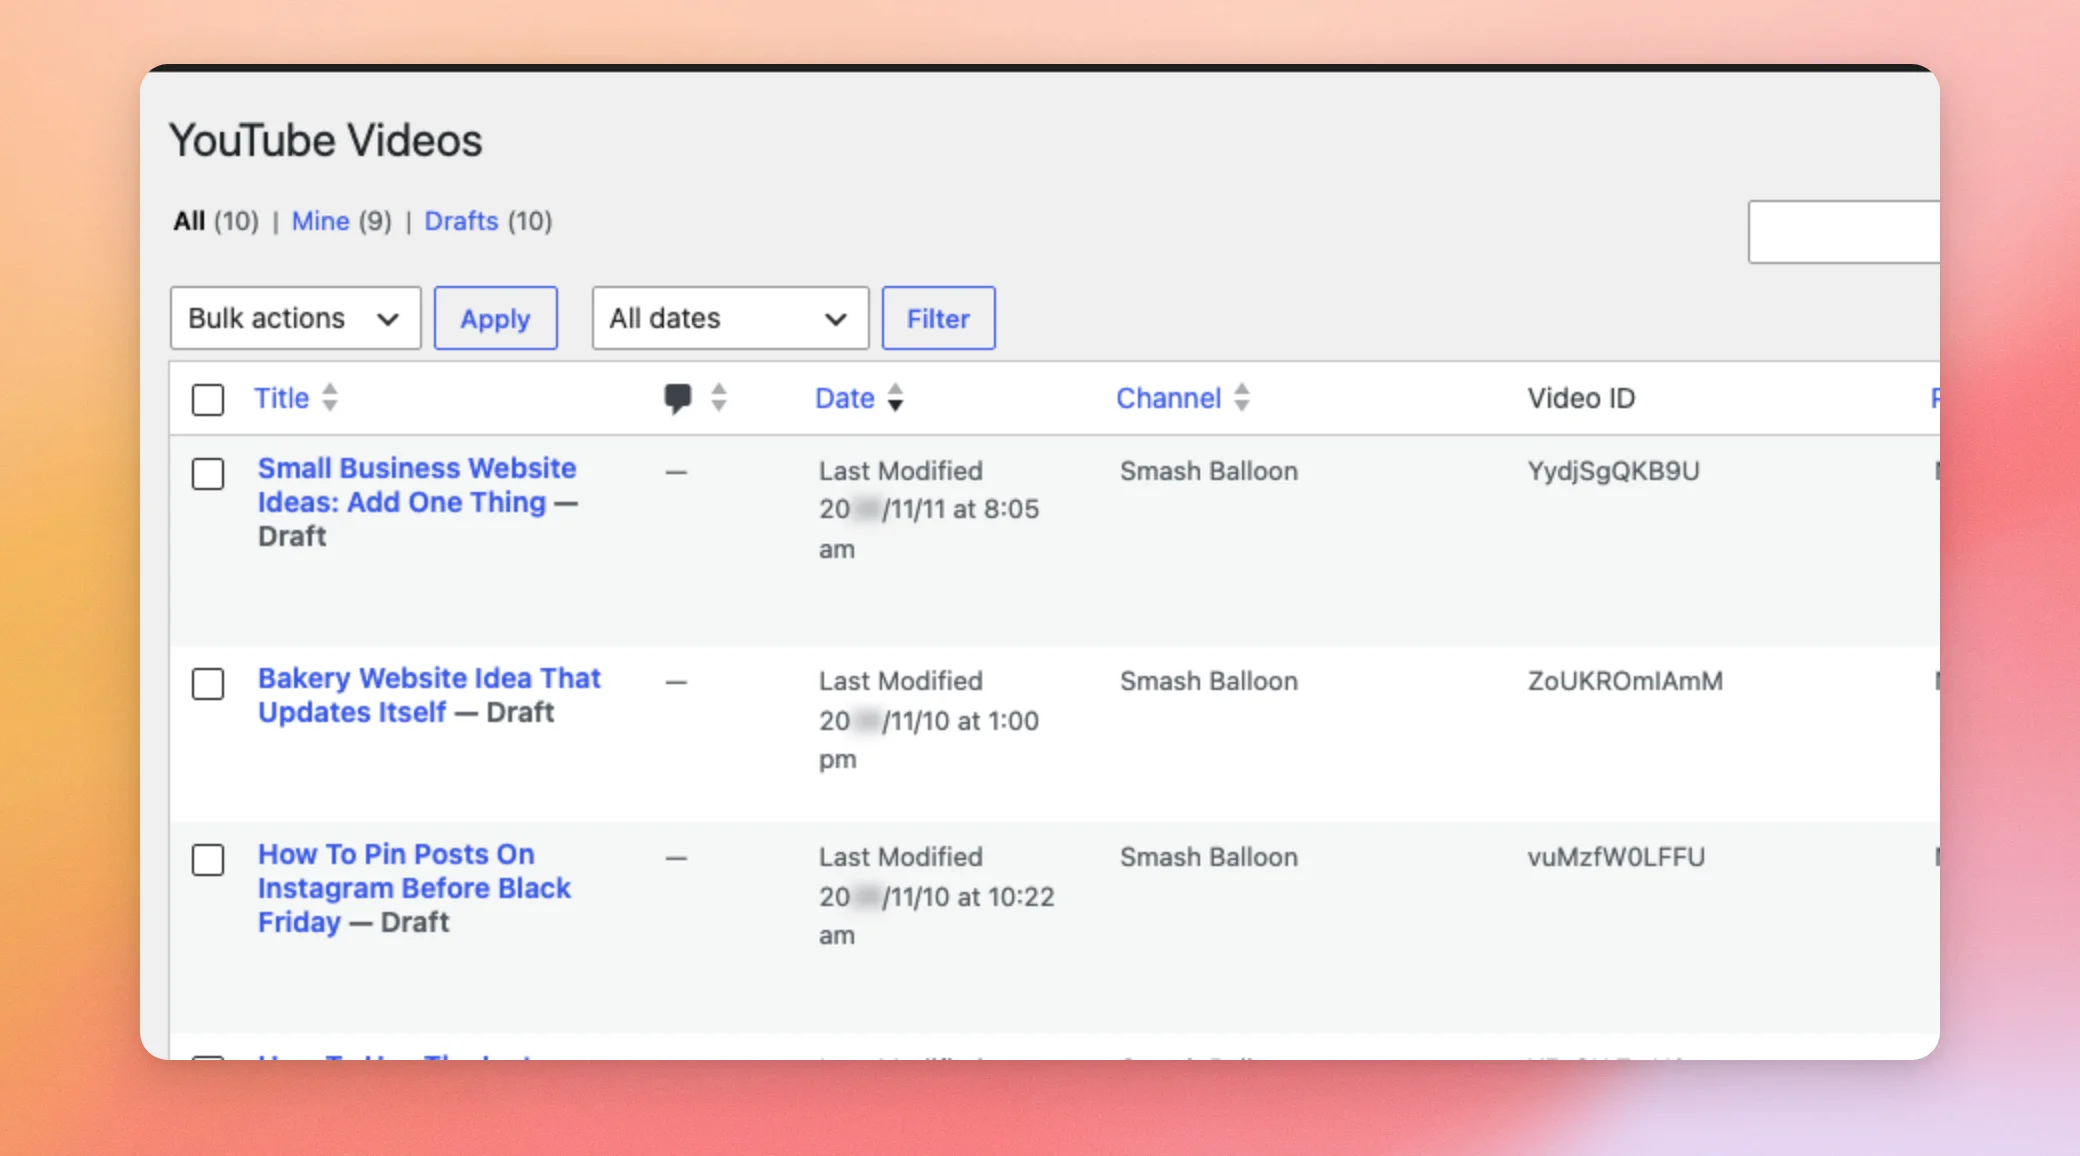
Every saved video is also listed under YouTube Videos in your dashboard. There, you can edit, publish, or trash it like any other post. The list shows each video’s title, status, channel, and video ID.
Next, we’ll look at the settings that control how these posts are saved.
Changing the Single Video Settings
The Single Video settings control the status and content of every saved video post.
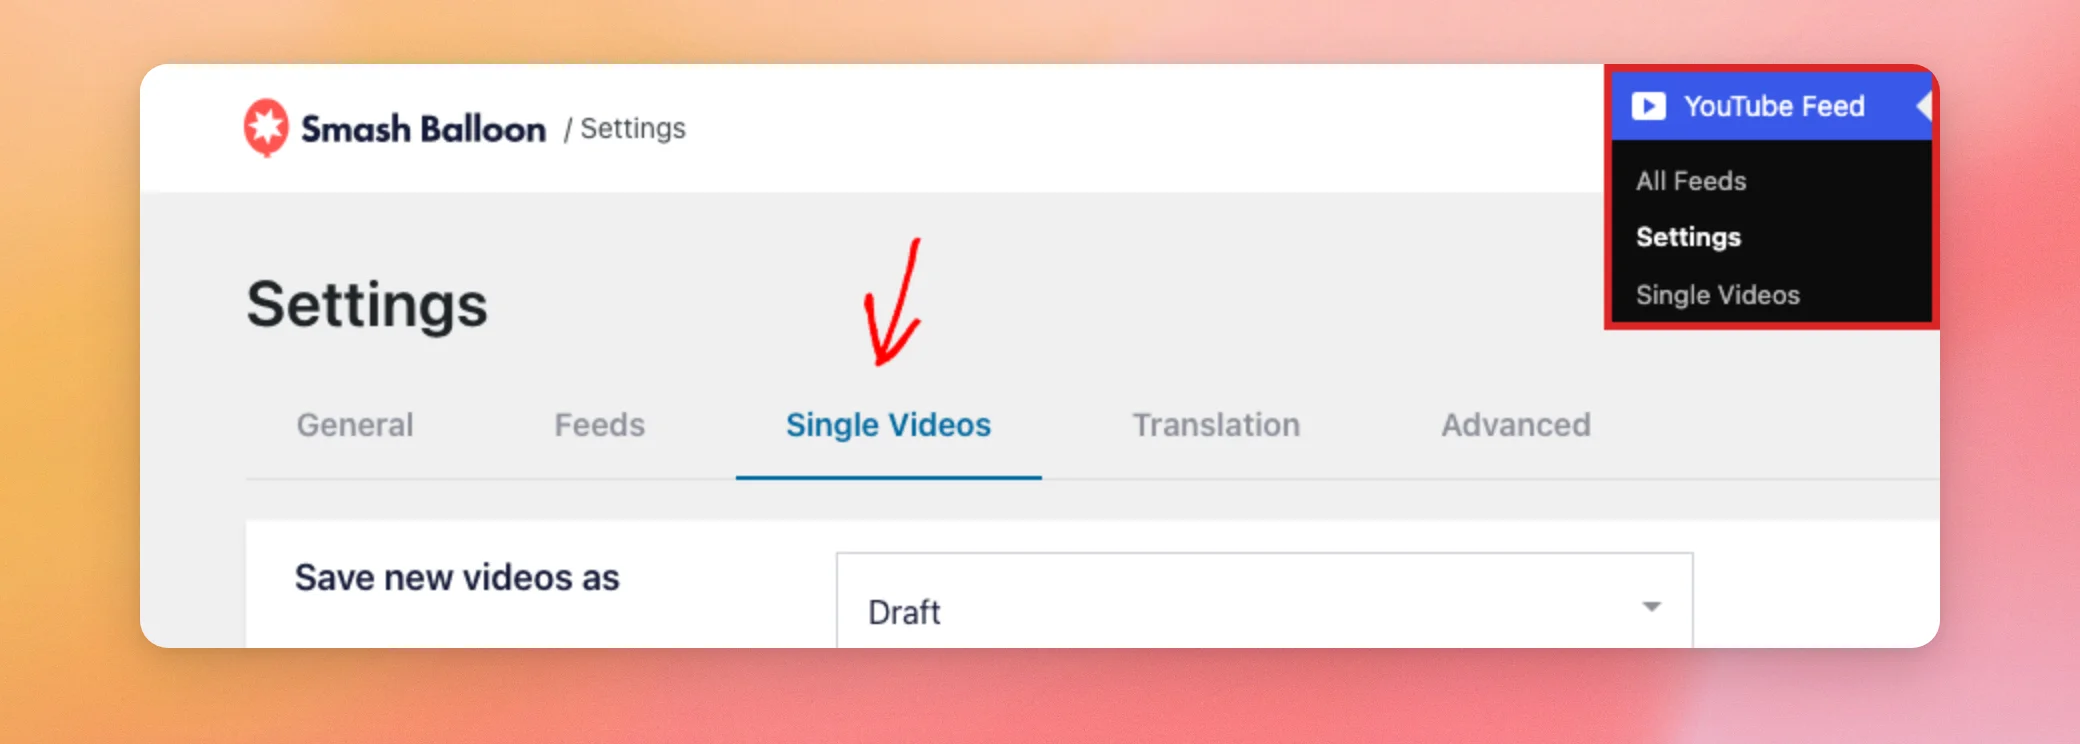
From your WordPress admin sidebar, go to YouTube Feed » Settings. Then click the Single Videos tab.
The tab has 3 settings.
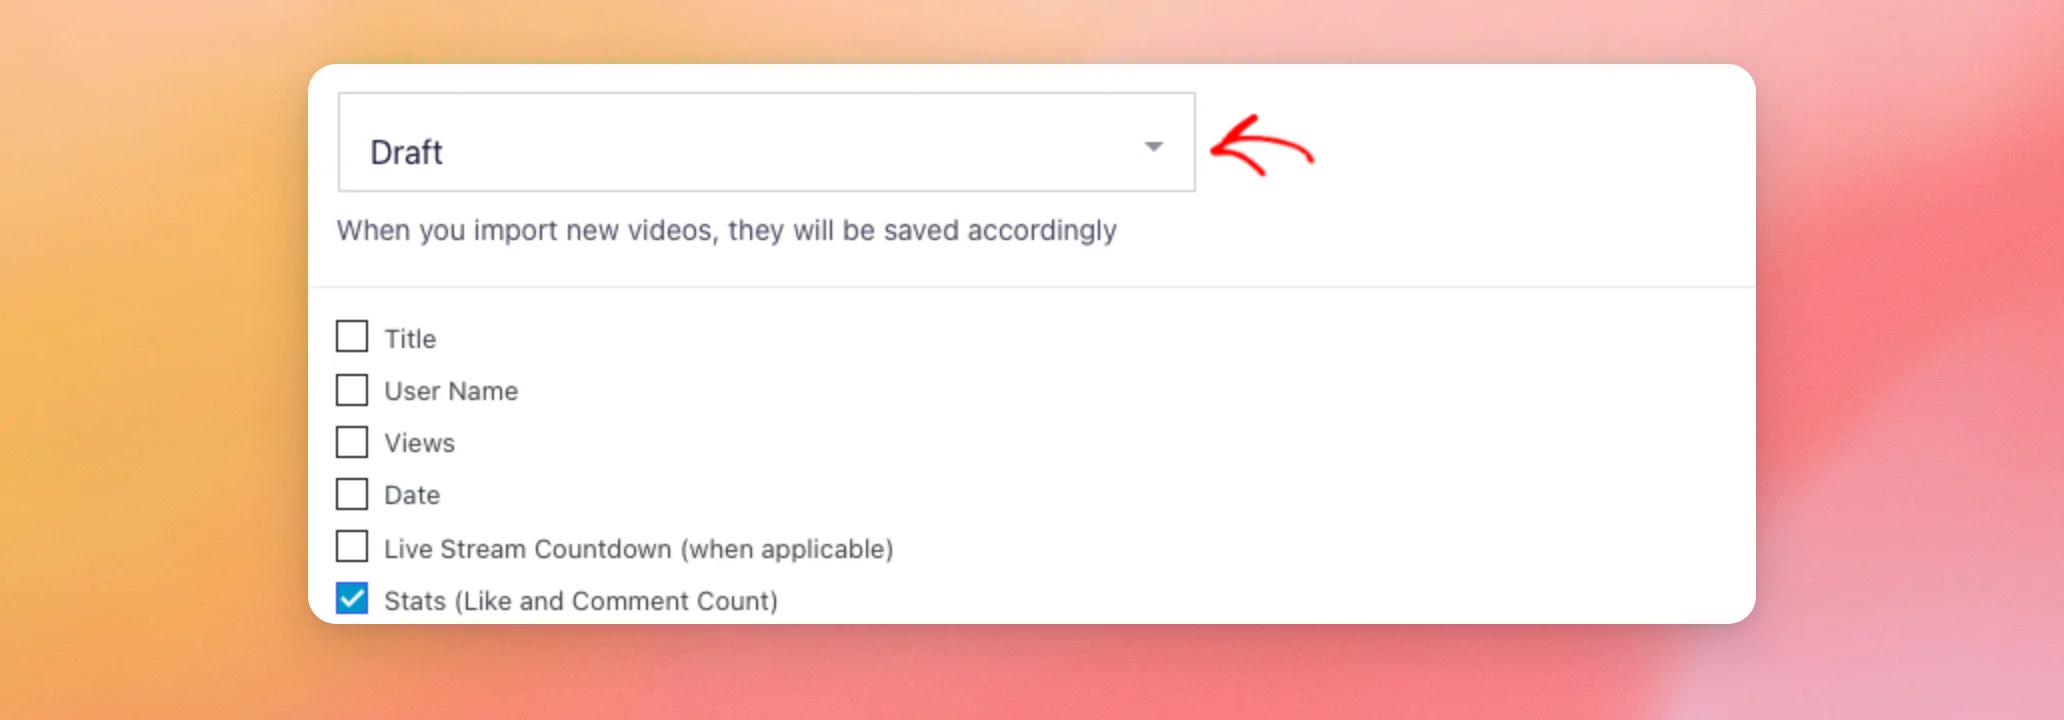
- Save new videos as sets the status of new video posts. It starts on Draft, so you can review each video before it goes live. Publish makes new videos public right away.
- Information to Display sets what each video post shows. The checkboxes cover the title, user name, views, date, a live stream countdown (when applicable), and stats (like and comment count). Stats is the only one selected by default.
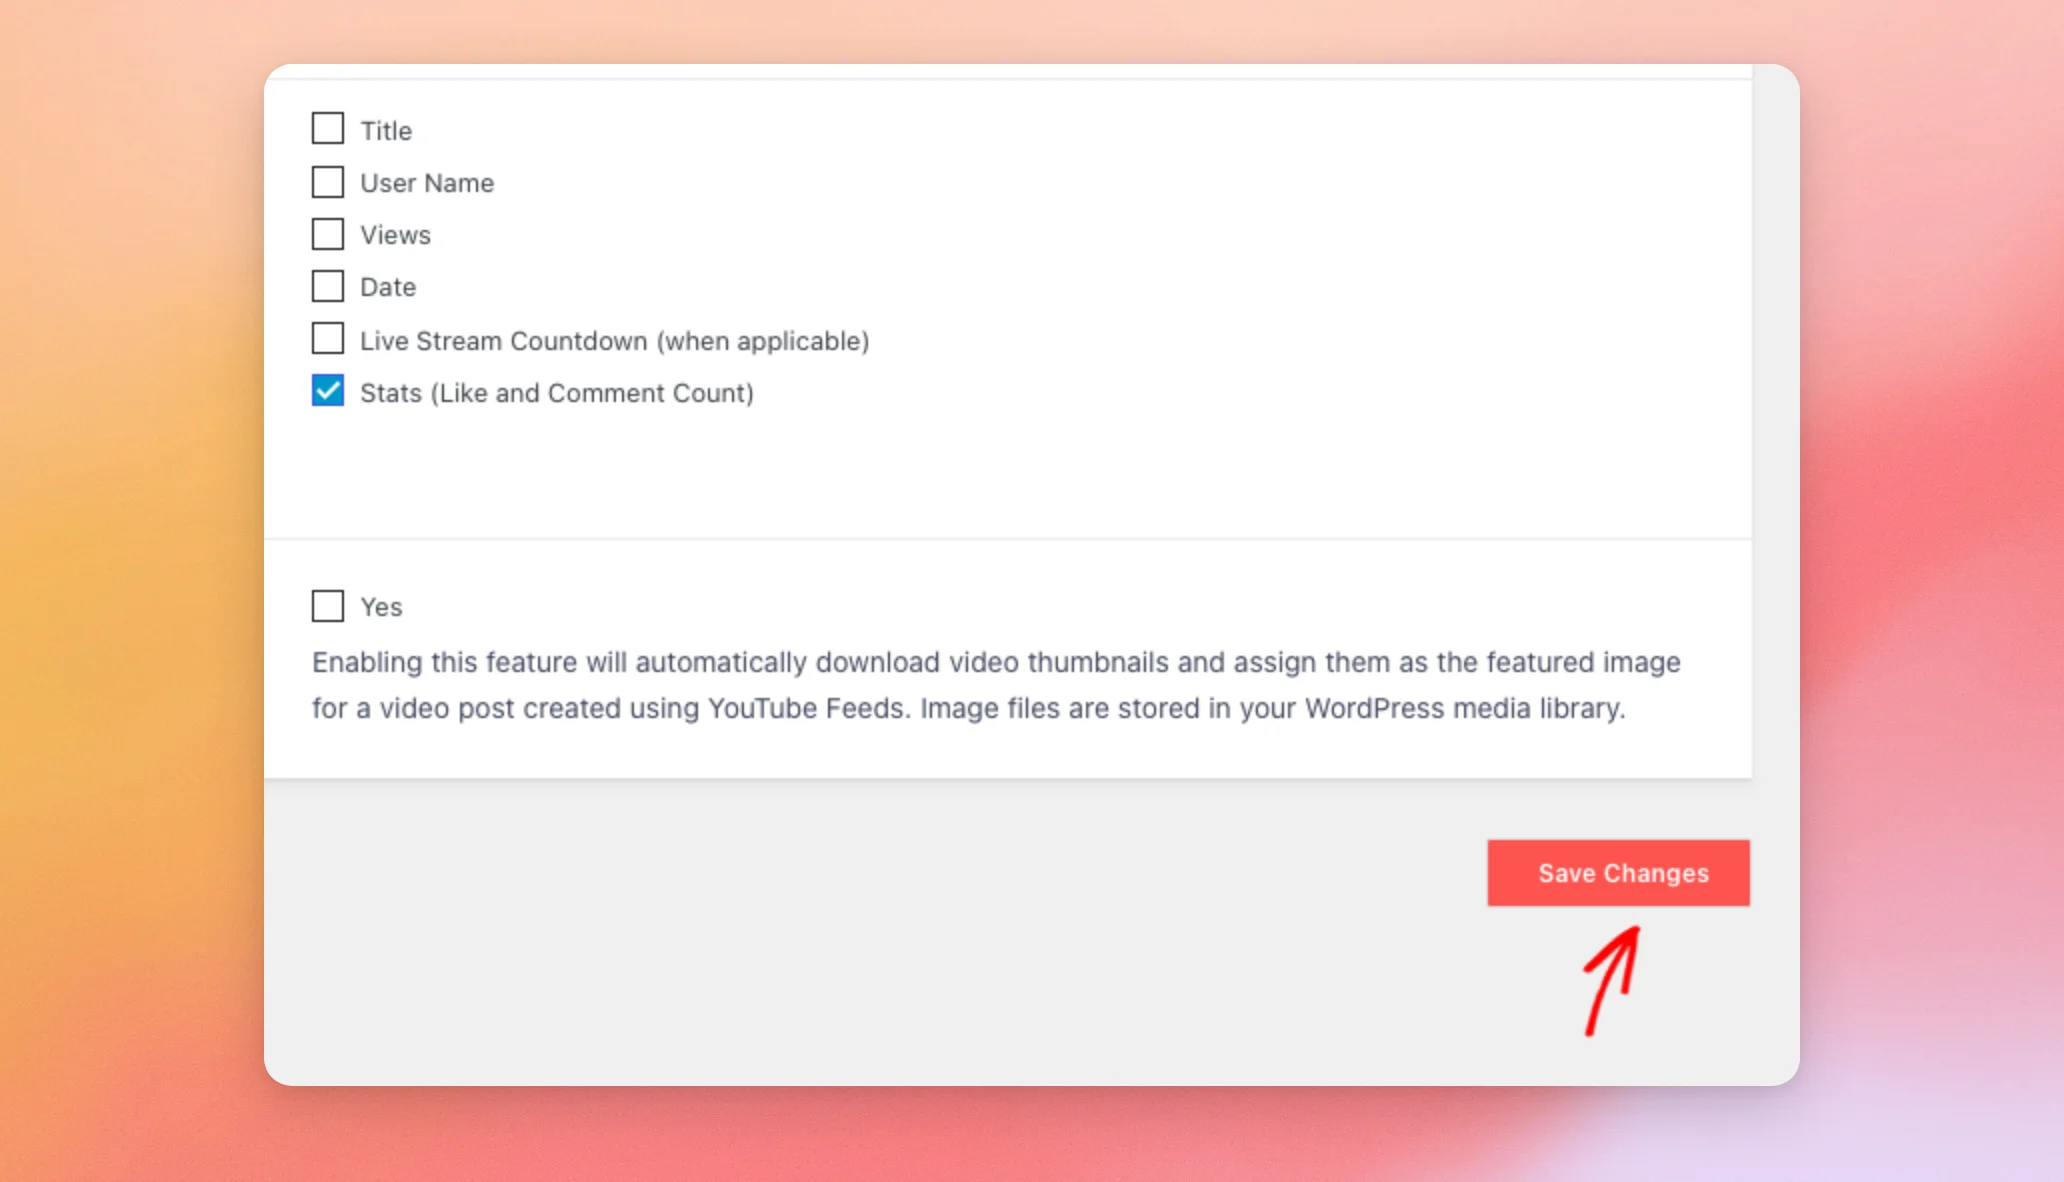
- Saved Featured Images is off by default, so the plugin does not download the thumbnails or set featured images. That keeps your media library free of extra image files. When you check Yes, the plugin downloads each video’s thumbnail to your WordPress media library and sets it as the post’s featured image.
When you are done, click Save Changes.
Your Single Video settings are now saved.
Turning Off Video Posts
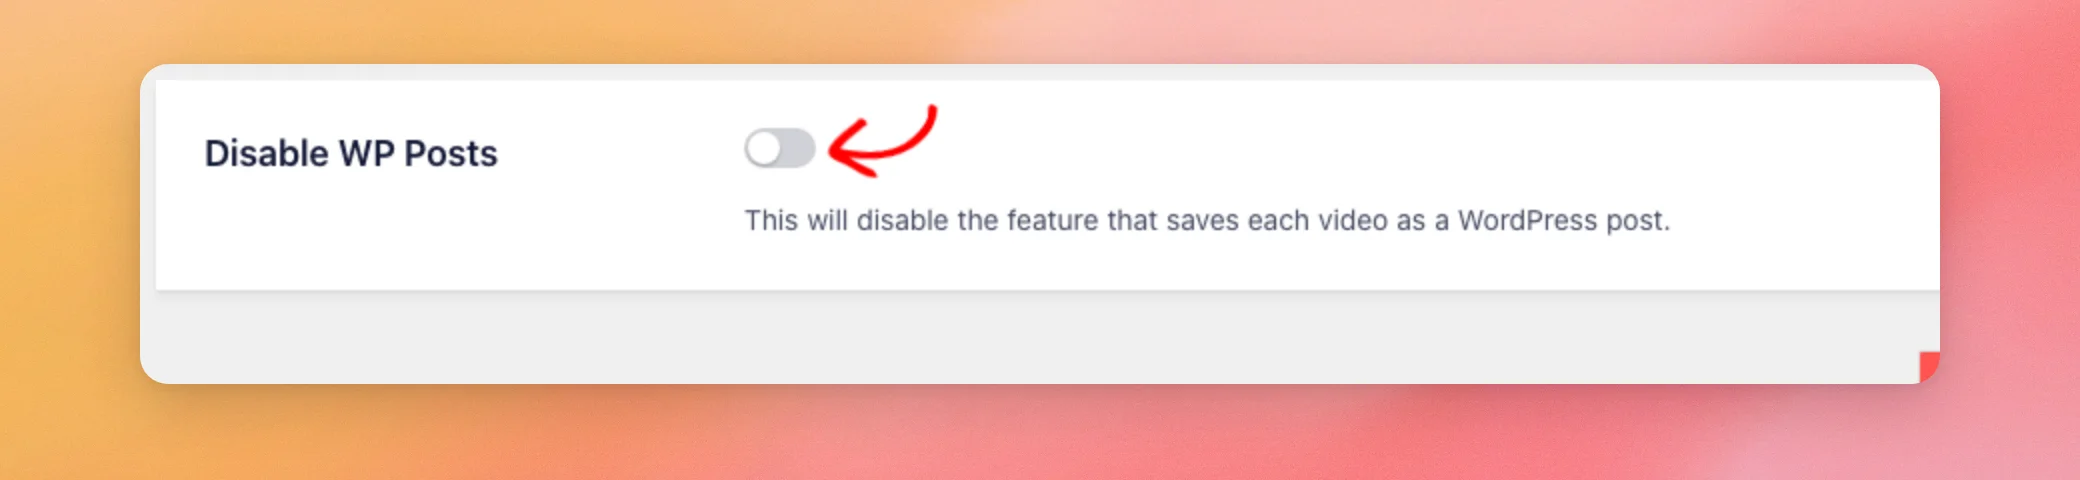
Disable WP Posts is off by default, so YouTube Feed saves each video in your feeds as a post. If you do not want video posts on your site, turning this setting on stops the plugin from saving them.
From your WordPress admin sidebar, go to YouTube Feed » Settings and click the Advanced tab.
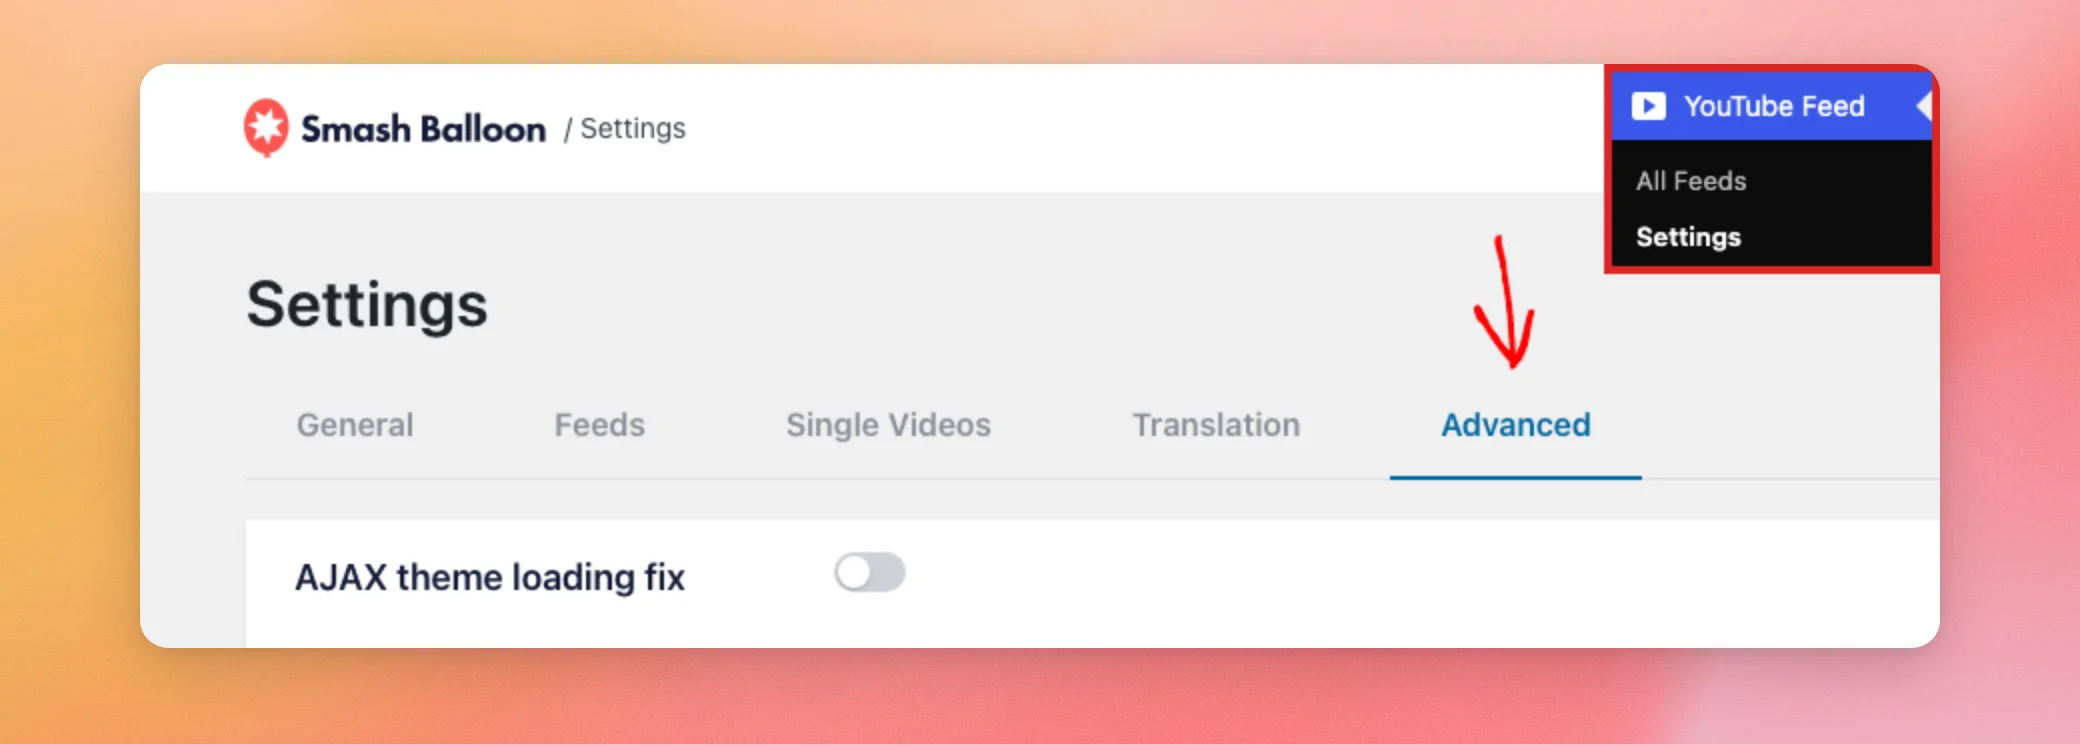
Then turn on Disable WP Posts.
When you are done, click Save Changes.
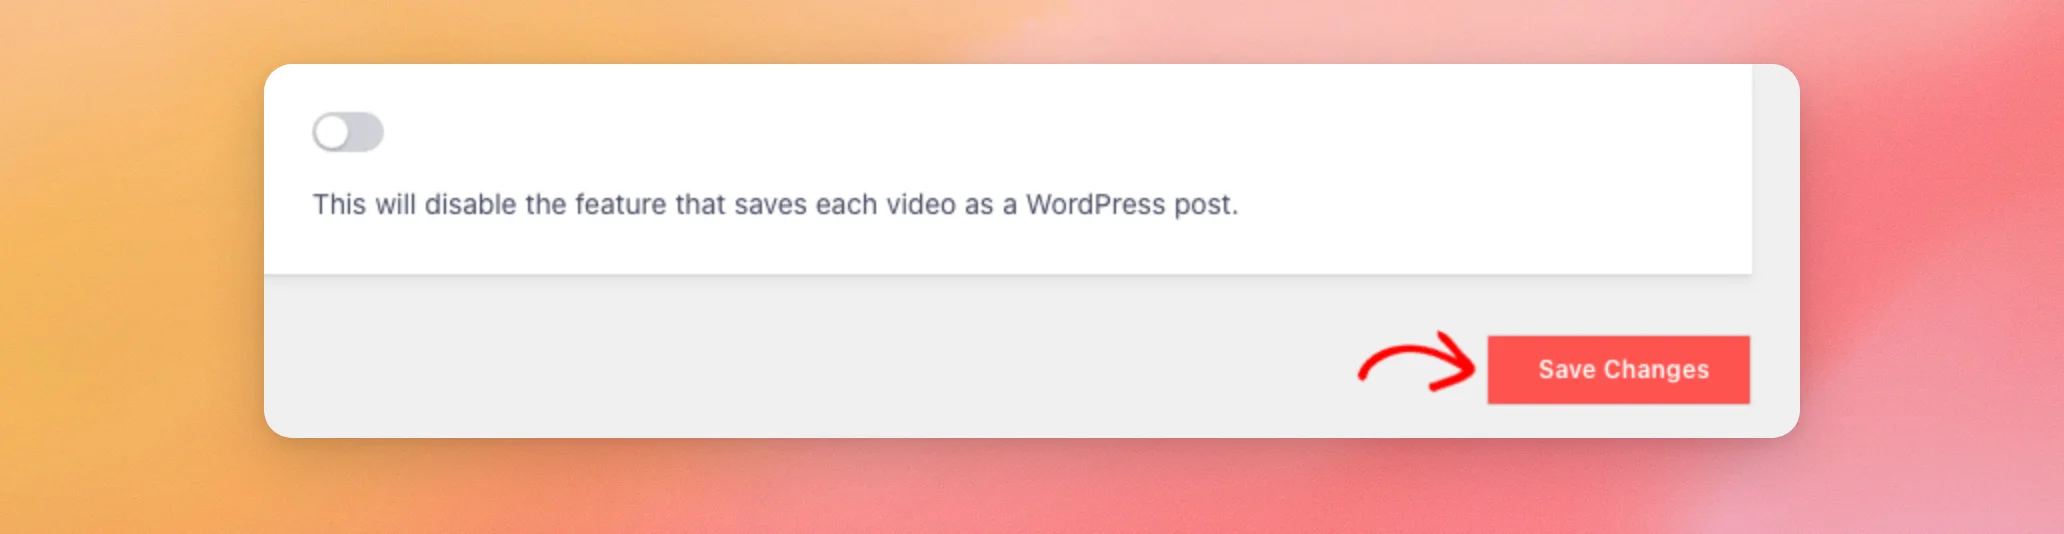
With the setting on, the plugin stops saving videos as posts. Posts it already saved stay on your site until you delete them.
If you would rather organize the saved videos, the next section shows how to add categories and tags.
Adding Categories and Tags to Video Posts
A code snippet adds category and tag support to your video posts.
The snippets below change your theme’s functions.php file. Make a backup of your site first. Updating or changing your theme can remove the changes. We recommend adding them to the functions.php file of a child theme so they stay in place.
Next, add this snippet to enable categories and tags for your video posts.
function sby_add_category_support() {
    register_taxonomy_for_object_type( 'category', 'sby_videos' );
    register_taxonomy_for_object_type( 'post_tag', 'sby_videos' );
}
add_action( 'init', 'sby_add_category_support' );
The categories you create for your videos need to be unique. They must not be the same as your normal post categories. For example, if you have a fishing website and a post category named “Fly Fishing”, name the matching video category something like “Fly Fishing Videos”. This keeps the WordPress database from running into issues.
To also show your videos on the category and tag pages, add this second snippet to the same file.
function sby_add_cpt_category_tag ( $query ) {
	if ( is_admin() || ! $query->is_main_query() ) {
		return;
	}
	if ( is_category() || is_tag() && empty( $query->query_vars['suppress_filters'] ) ) {
		$sby_post_types = array( 'sby_videos' );
		$query->set(
			'post_type',
			array_merge(
				array( 'post' ),
				$sby_post_types
			)
		);
	}
}
add_filter( 'pre_get_posts', 'sby_add_cpt_category_tag' );
After you add the snippets, you may need to delete your existing video posts and let the plugin save them again. Categories and tags are then available on the saved videos.
See Refreshing Saved Videos below for the steps. If a video post shows a 404 error afterward, the next section covers that fix.
Fixing 404 Errors on Video Posts
If you see a 404 error when you visit a single video post, WordPress most likely needs to refresh its permalinks. The video post type uses videos in its web addresses. WordPress only learns about that after you save your permalinks again.
From your WordPress dashboard, go to Settings » Permalinks.
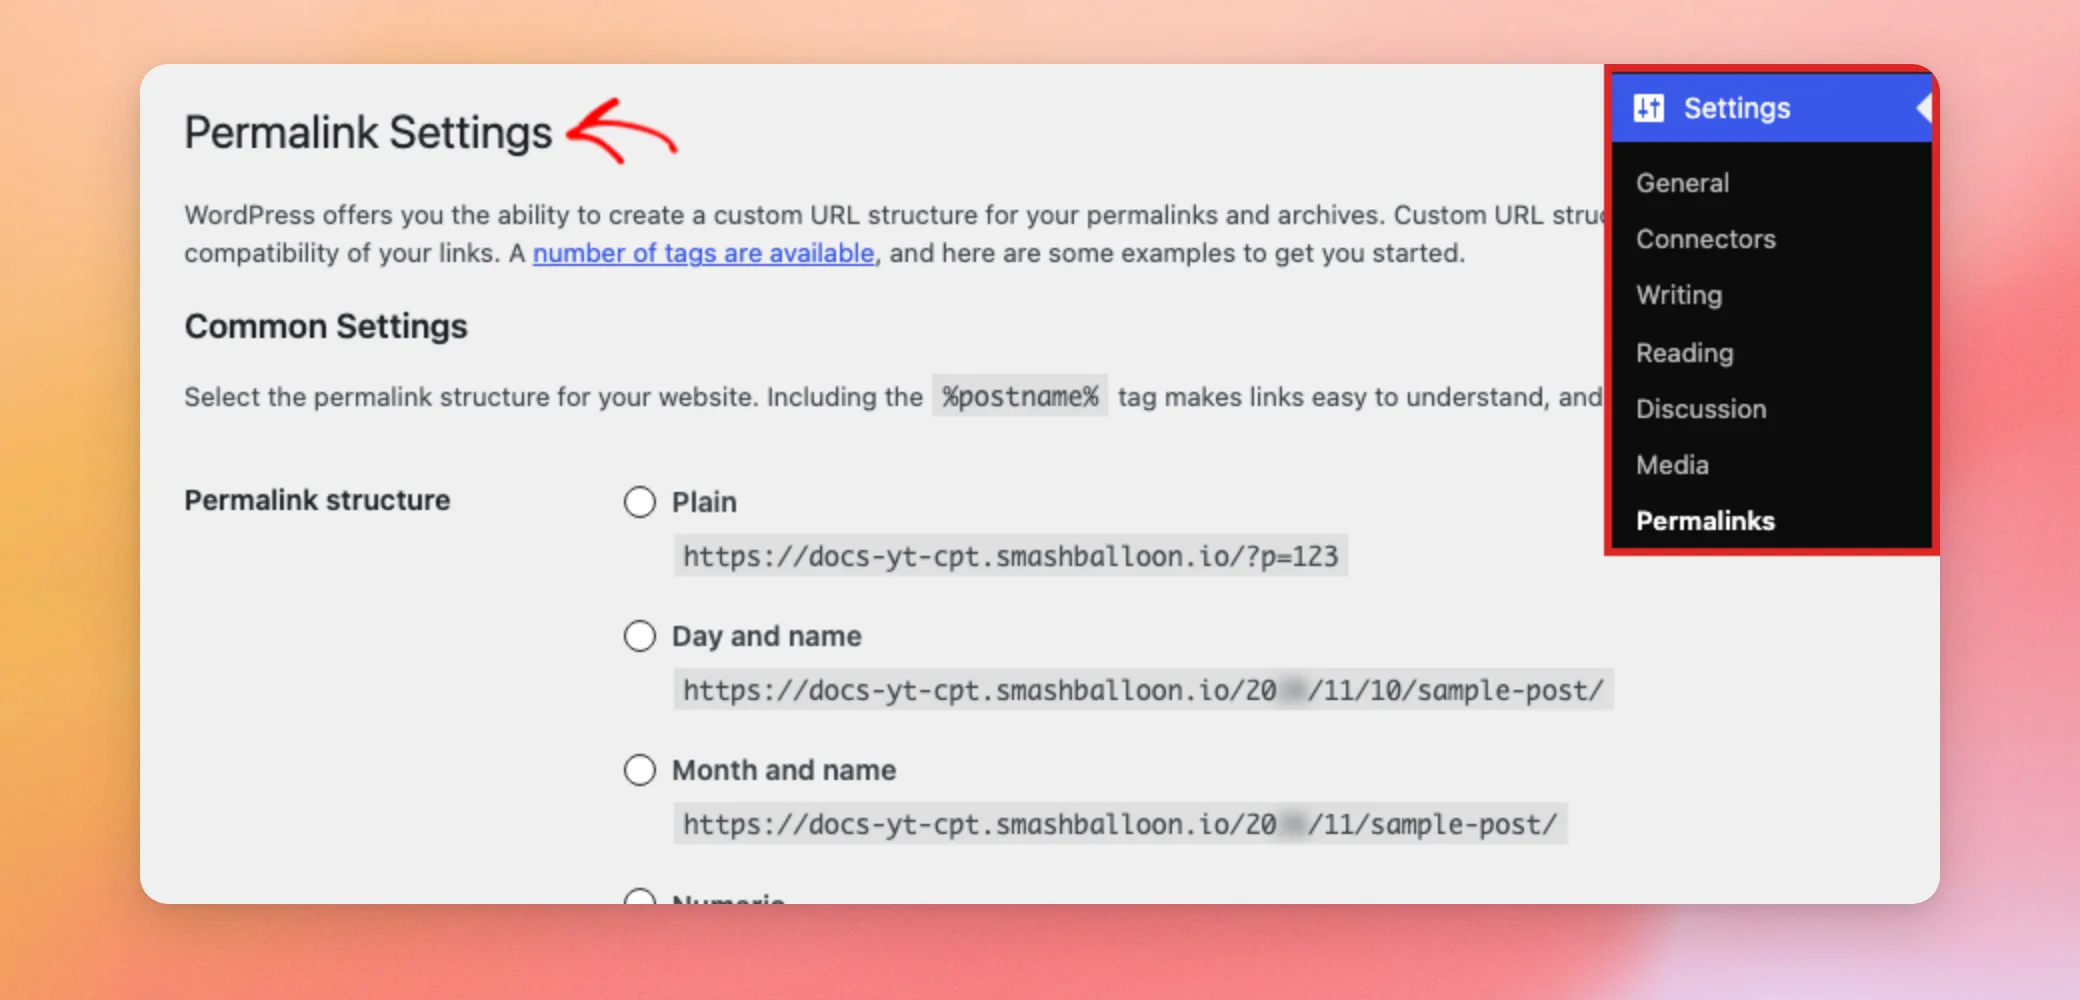
You do not need to change anything. Next, scroll to the bottom of the page and click Save Changes.
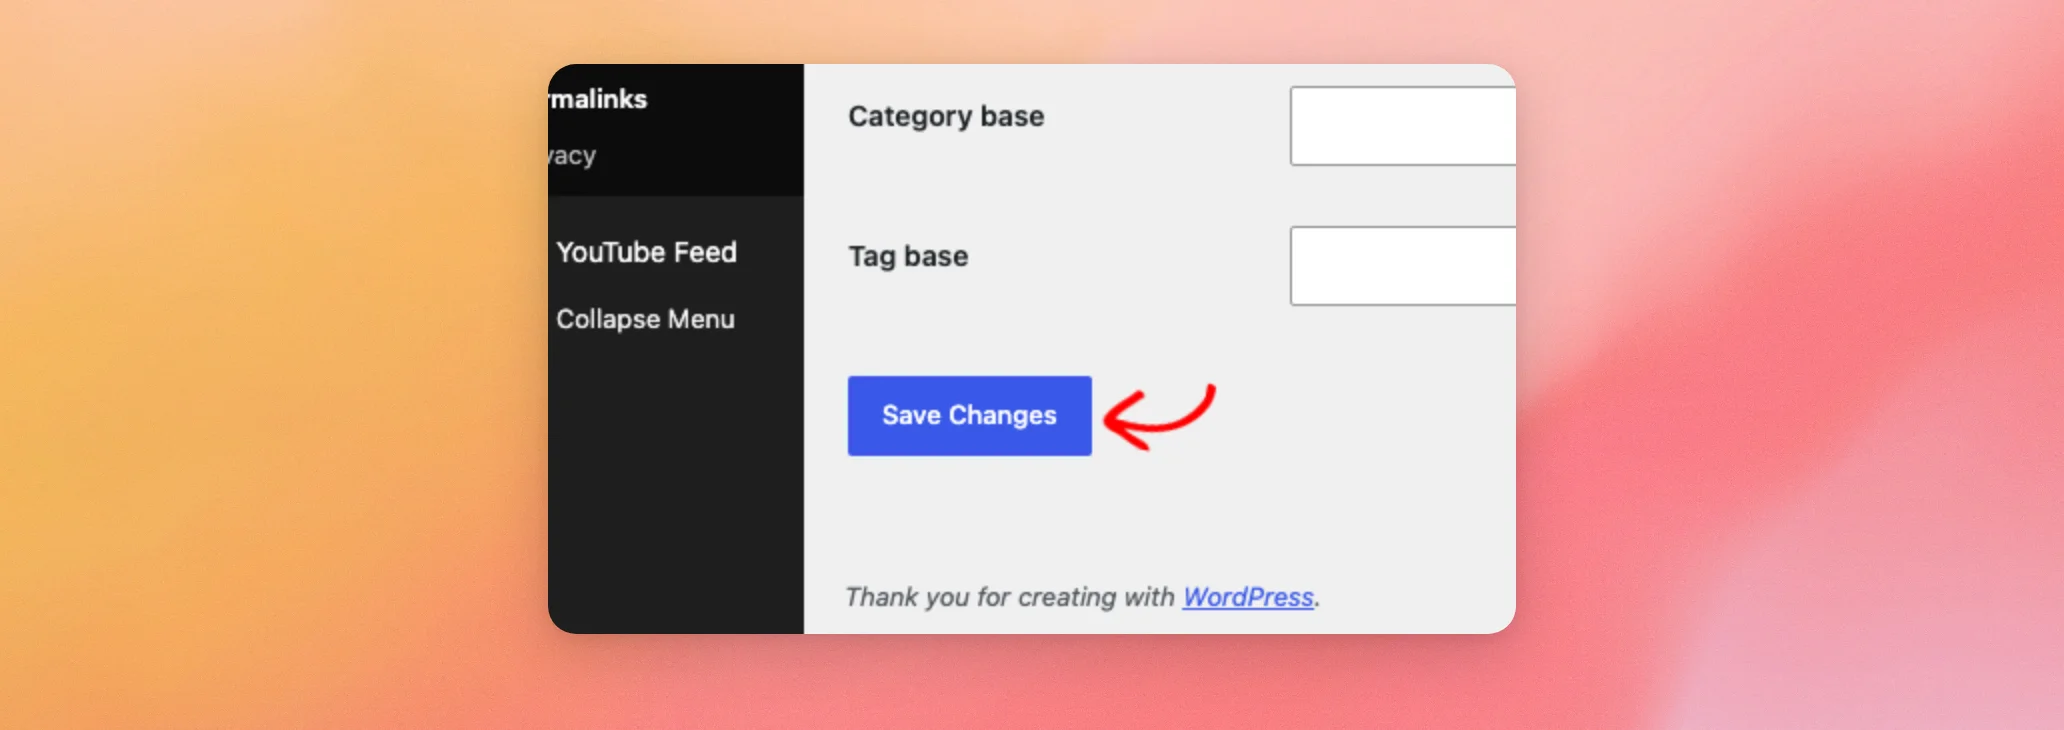
Then, visit the video post again. If a saved video is still missing information, the next section shows how to refresh it.
Refreshing Saved Videos
Clearing your feed’s cache does not update videos that are already saved as posts. If a saved video is missing information, or if you added categories and tags, delete the saved videos first. Then, clear the caches.
First, go to YouTube Feed » Single Videos. Then choose the channel and click Delete All. If you move the posts to the trash from YouTube Videos instead, delete them permanently from the trash too. Then the plugin can save them again.
Next, go to YouTube Feed » Settings and click the Feeds tab.
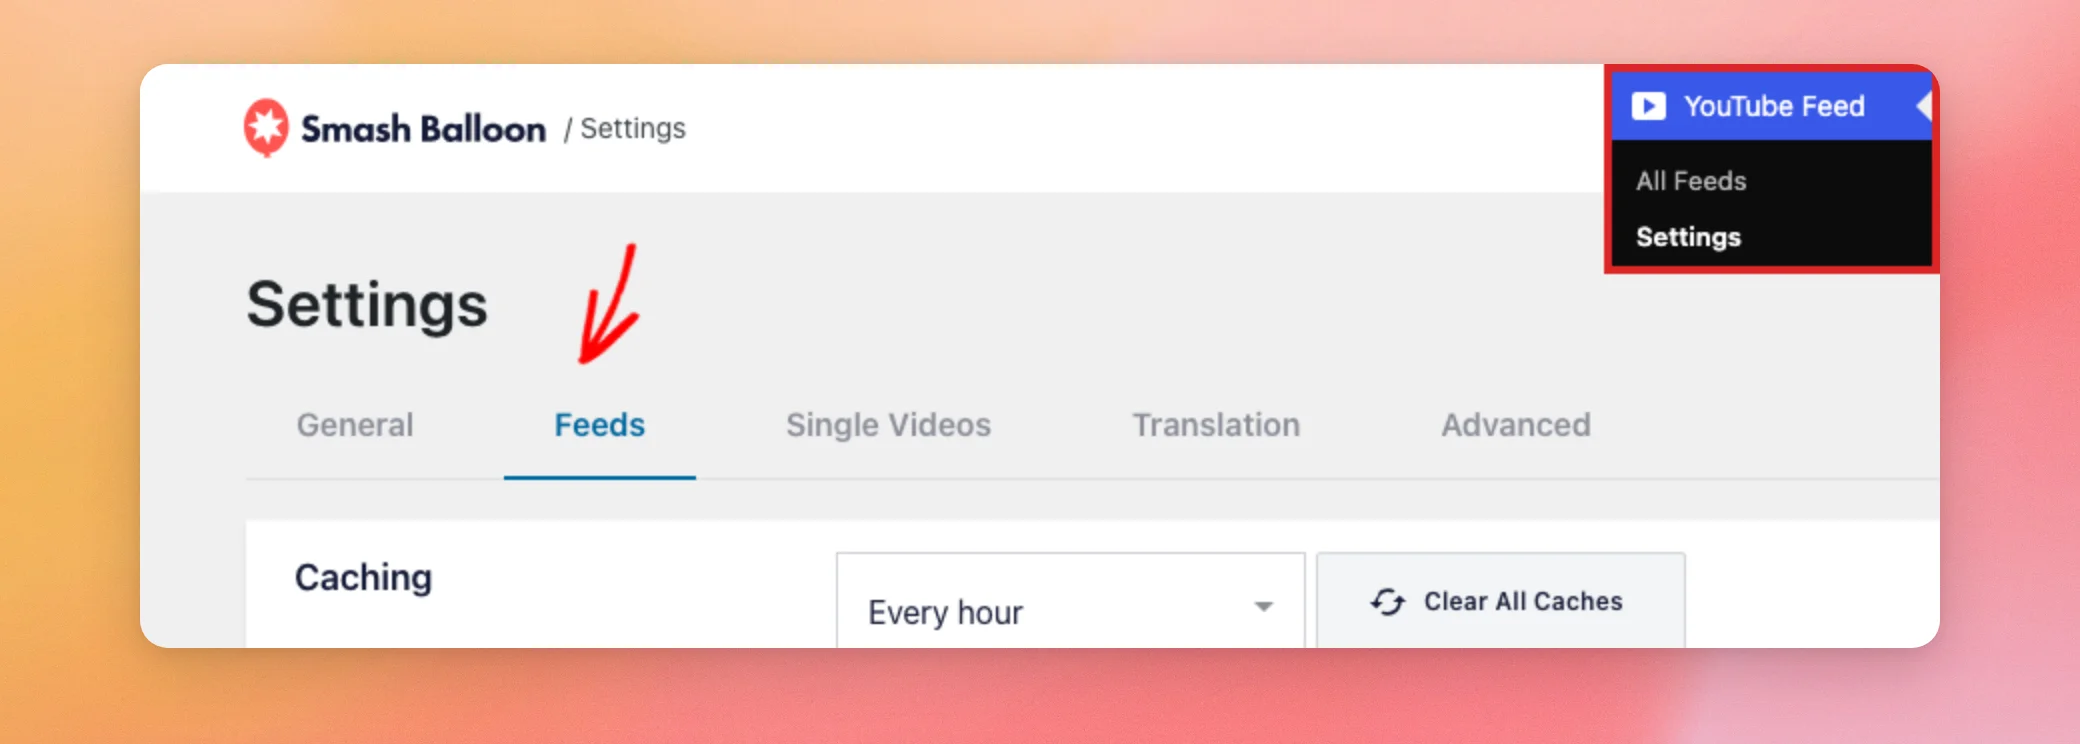
In the Caching section, click Clear All Caches.
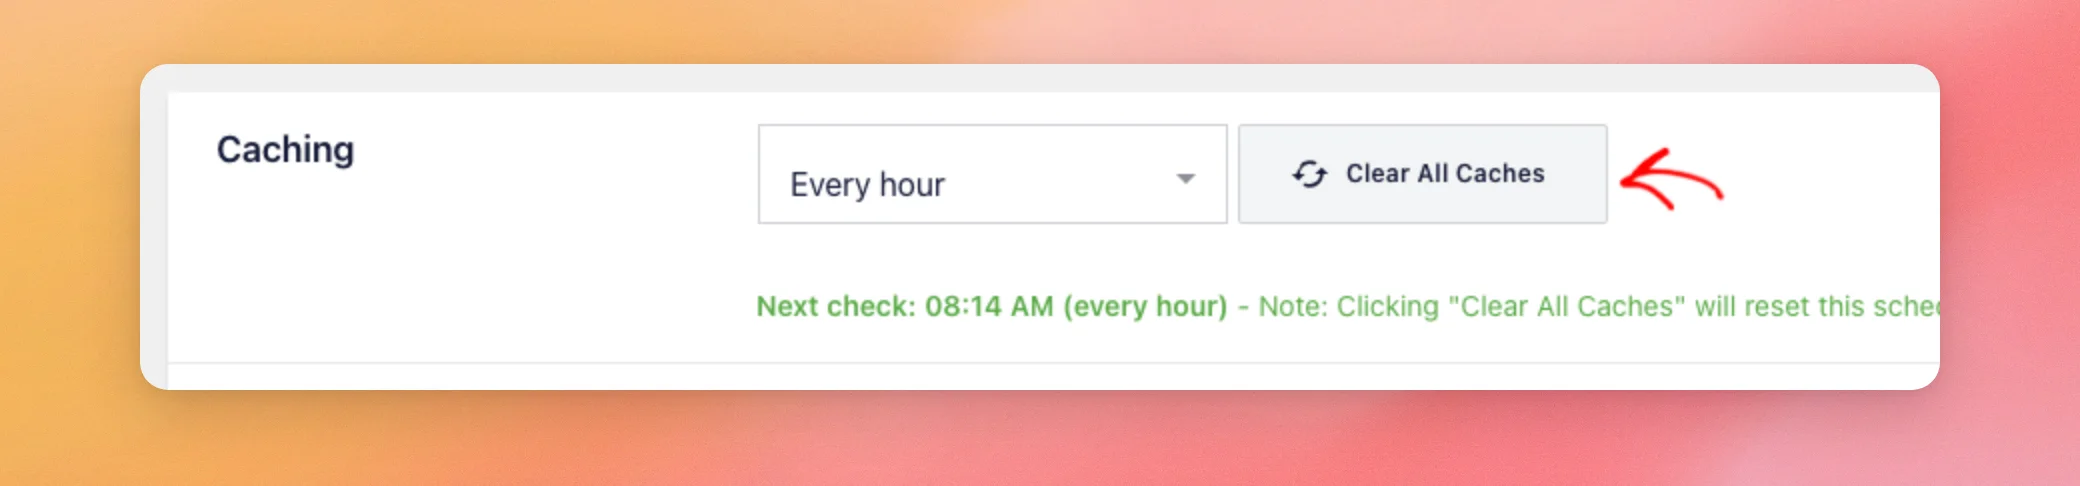
Finally, load a page that shows the feed. The plugin saves the videos again.
That’s it! You now know how to manage your saved videos, add categories and tags, and fix 404 errors on video posts. If you want to change how your videos look on the page, our guide on custom templates is the next step.
Frequently Asked Questions
Below, we’ve answered some of the most common questions about saving YouTube videos as posts.
Do I need a paid license for video posts?
Yes. Video posts are part of the paid version of YouTube Feed. The Single Videos page, where you publish or delete a channel’s videos in one step, needs the plus license level or higher.
Why don’t I see any video posts?
The plugin saves videos when a page with your feed loads. If no feed has loaded yet, there are no posts to show. Also check that Disable WP Posts is turned off in YouTube Feed » Settings » Advanced.
Can I make new video posts public right away?
Yes. Go to YouTube Feed » Settings » Single Videos and set Save new videos as to Publish. See Changing the Single Video Settings above.
Why do my single video posts show a 404 error?
WordPress needs to refresh its permalinks. Go to Settings » Permalinks and click Save Changes. See Fixing 404 Errors on Video Posts above.
Does clearing the cache update my saved videos?
No. Delete the saved videos first, then click Clear All Caches. See Refreshing Saved Videos above.