Installing and Configuring the Custom Facebook Feed WordPress Plugin
Watch the videos below for an overview of how to setup and use the WordPress plugin, or scroll down for step-by-step written instructions.
30-Second Quick Setup
5-minute Overview
1) Once you’ve purchased the Custom Facebook Feed plugin click on the “Downloads” tab to download the plugin. Your download link, license key, and purchase information is also emailed to you at the address which you provided during checkout.

2) Once you’ve downloaded the zip file there’s no need to open it. You’ll be uploading and installing this zip file directly to WordPress.
Note: If you’re on a Mac then your OS may be set up to automatically unzip zip files when downloading. You can zip the files up again by just right clicking on the folder containing the files and clicking ‘Compress’. Alternatively, you can download the zip directly from your account.
3) If you are using the free version of the WordPress plugin then be sure to deactivate it prior to installing the Pro version.
Note: To transfer your settings from the free version to the Pro version just do the following:
1) Check the ‘Preserve Settings when plugin is removed’ setting, which can be found in the following location in WordPress: Facebook Feed > Customize > Misc > Misc Settings
2) Remove the free version
3) Install and activate the Pro version
To upload the Pro version of the plugin click Add New at the top of your WordPress Plugins page.
4) Click Upload at the top.
5) Browse to the zip file which you downloaded when you purchased the plugin and click Install Now
6) Activate the plugin.
7) You’ll now see the Facebook Feed menu appear in your WordPress menu. Navigate to the Settings page and click on the License tab to enter your license key.

8) Paste your license key into the field and click Save Changes
9) Click Activate License
10) Click on the Configuration tab and then click on the button labeled Connect a Facebook Account
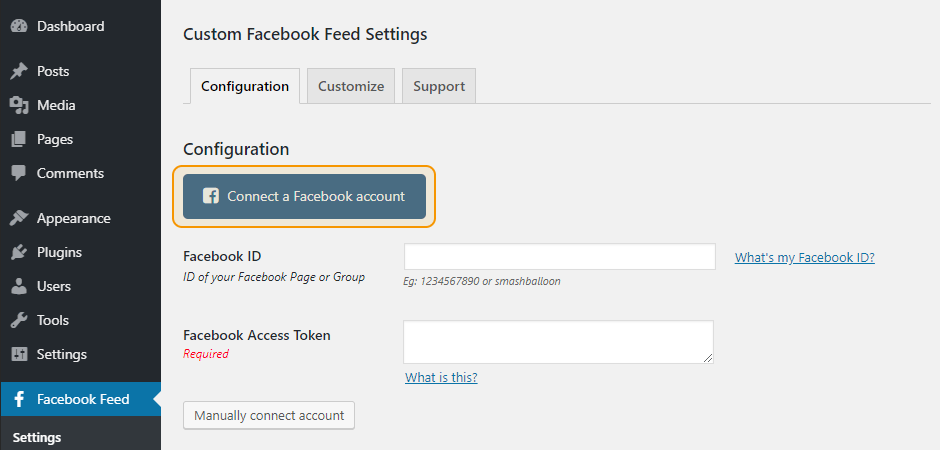
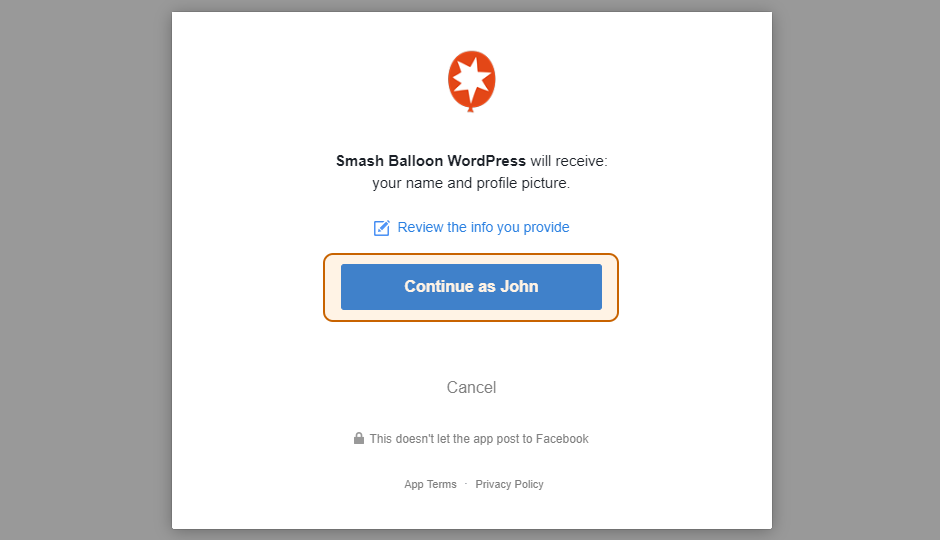
11) You will be redirected to Facebook and if you are not logged in then will be prompted to do so. Once logged in, follow the prompts by clicking the Continue button.
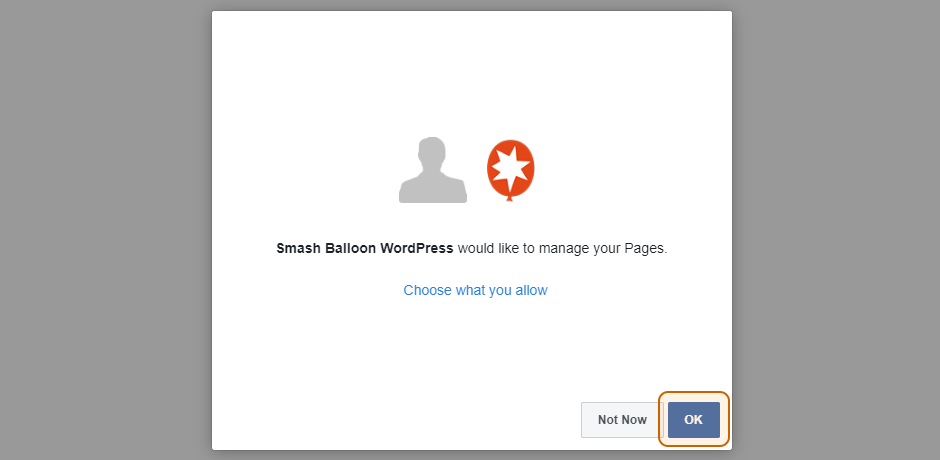
12) Facebook will then ask you to authorize our plugin to “manage your Pages”. Click OK.
Important: This does not allow our plugin to manage your page settings, edit, post to, or do anything else to your Facebook page. It simply allows the plugin to retrieve a “read-only” Access Token for your page which allows it to retrieve posts or other content you wish to display.
Note: If you plan to display feeds from more than one Facebook page, or use the plugin on other websites, then it is not advised that you use the “Chose what you allow” option, as doing so will prevent the plugin from being able to retrieve a token for other Facebook pages you manage either now or in the future.
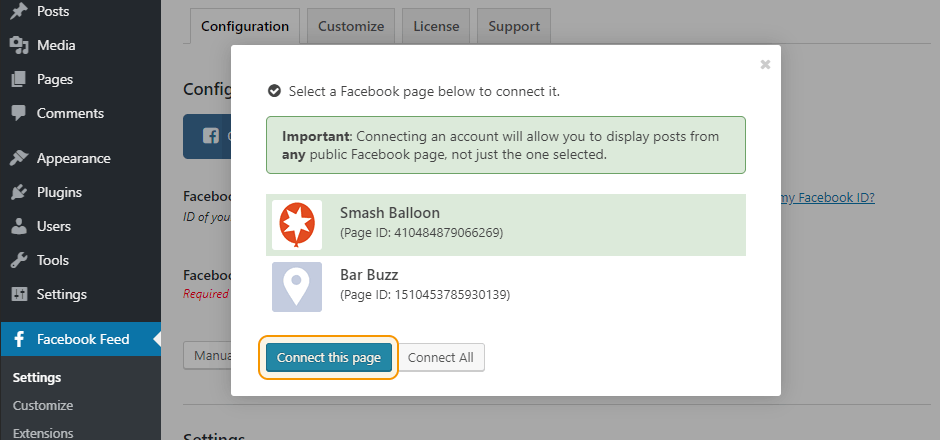
13) A list of Facebook pages which you are an admin of will be displayed. Select a page and click “Connect this page”.
Note: You do not need to select the Facebook page that you want to display posts from. An Access Token from any Facebook page will work to display posts from any other Facebook page.
14) Click Save Settings
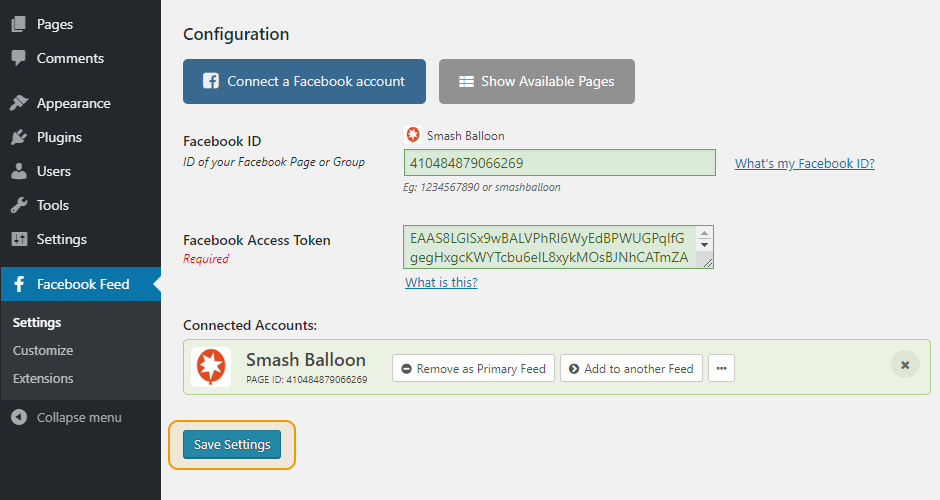
15) To display your feed simply add the
16) You can display multiple Facebook feeds on one page and specify options within the shortcode. Click here for a full list of shortcode options.
17) Navigate to the Customize page to customize your feed.


